Gluten Free bread shouldn’t be a brick. This gluten free Millet Sandwich Bread is light, soft and squishy, holds up to a sandwich quite well, and has a great flavour.
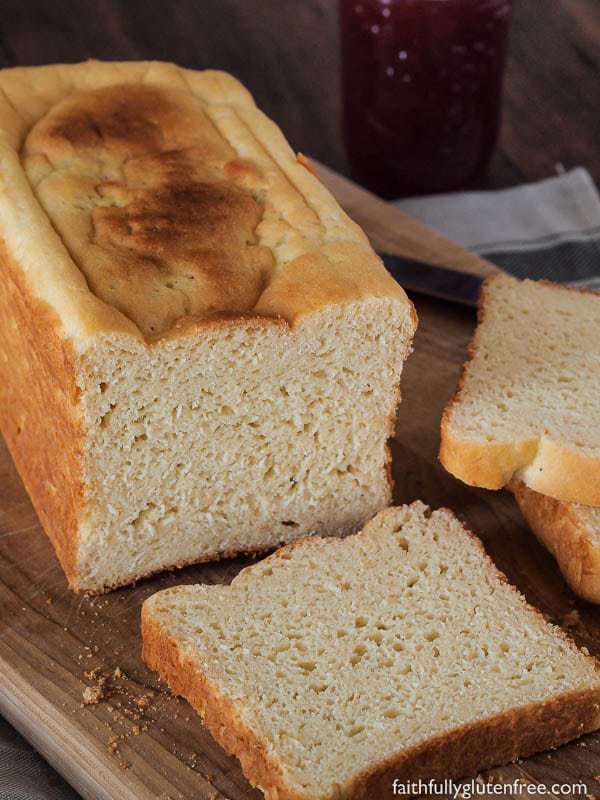
When going gluten-free, I find that one of the hardest things to cope with is not having good bread to make a sandwich with. Although the bread that is available in the stores now is much better than it was 5+ years ago, it’s still not great.
Don’t get me wrong, I usually have a loaf of store-bought bread in my freezer, you know, for emergencies. But, when it comes to gluten-free, nothing beats a homemade loaf of bread.
Gluten-free bread is really easy to bake as well, you just have to be a little fearless in the kitchen. I haven’t had an inedible loaf of bread in years. Sure, sometimes they don’t turn out that pretty, but they are always tasty.
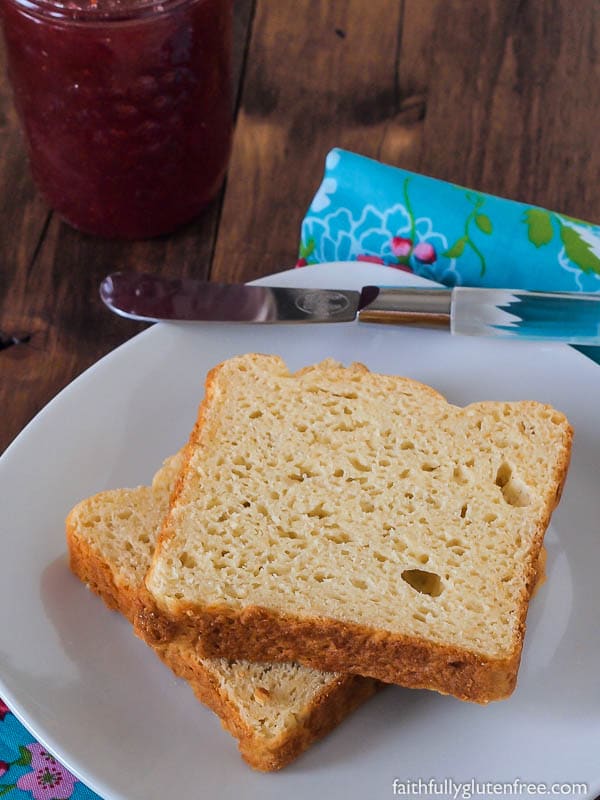
After playing around with some bread recipes, I found one that I really like. This gf Millet Sandwich Bread is light, soft and squishy, holds up to a sandwich quite well, and has a great flavour.
I’ve also used this gluten free Sandwich Bread to make both an amazing gluten free Maple Butter Tart Bread Pudding and gluten free Bread Stuffing, and it worked beautifully for both dishes.
To use it for those things, I cut the bread into cubes, and dried them out in the oven set to a low temperature. You don’t want crispy toasted, just lightly toasted and dried out. This helps the bread to hold up to the moisture & stirring that it is about to undergo.
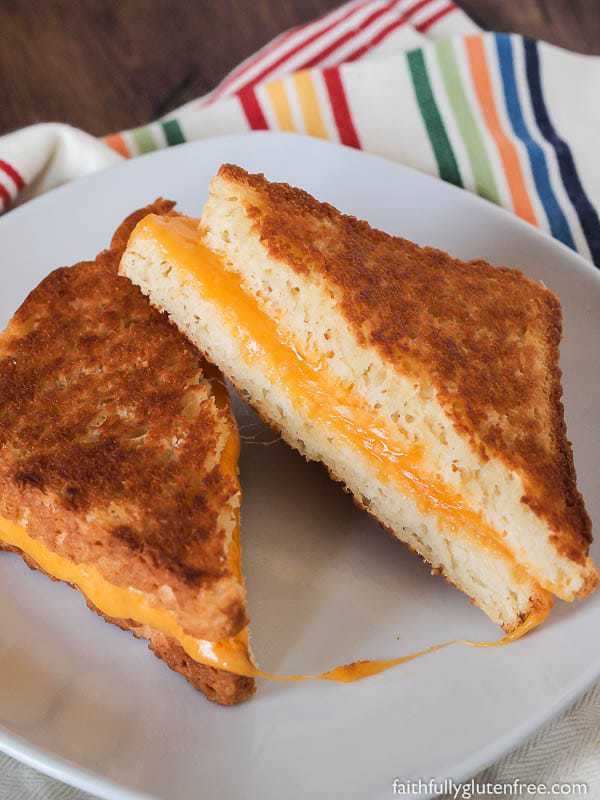
This gluten free sandwich bread also makes great grilled cheese sandwiches. This grilled cheese sandwich would be perfect served with my Creamy Gluten Free and Dairy Free Tomato Soup.
Some tips to get the perfect loaf of gluten free Millet Sandwich Bread:
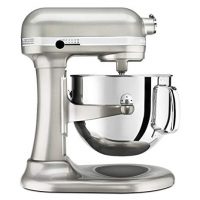
To get the best results when baking gluten-free bread, it really is best to use a stand mixer with a paddle attachment. After incorporating all the ingredients, I always put the mixer on medium speed and let it beat for a few minutes. This gets things evenly mixed, incorporates air into the mixture, and is basically the ‘kneading’ that wheat-based bakers do by hand. I don’t have a very good hand mixer, but the one I have would not be able to hold up to bread dough. If you have a very powerful one, it may work.
I know stand mixers are expensive, but if you were to ask me one thing that every gluten-free baker needs, a stand mixer would be my answer. If you’ve been diagnosed with celiac disease, it’s a life-long diagnosis, you will be baking gluten-free for years to come, so it’s a good investment.
After 10 years, I am still in love with my bowl-lift Kitchen Aid stand mixer. I know it’s not in everyone’s budget, but you can get more inexpensive machines as well, like this Hamilton Beach stand mixer. When it comes to baking bread, I don’t believe that mixing by hand will give you the same results as mixing with a stand mixer. Just a heads up.
What kind/size of pan is best for this gluten free sandwich bread?
Over the years I’ve played with a few different kinds of pans. I found non-stick pans become “very-stick pans” after a few uses, even when lined with parchment paper. To make things easier, I decided to give silicone bread pans a try. This is the silicone bread pan that I use, and I really like them. The size is perfect to get a nice rounded loaf. With doing nothing to the pan at all, the bread pops right out when it’s baked.
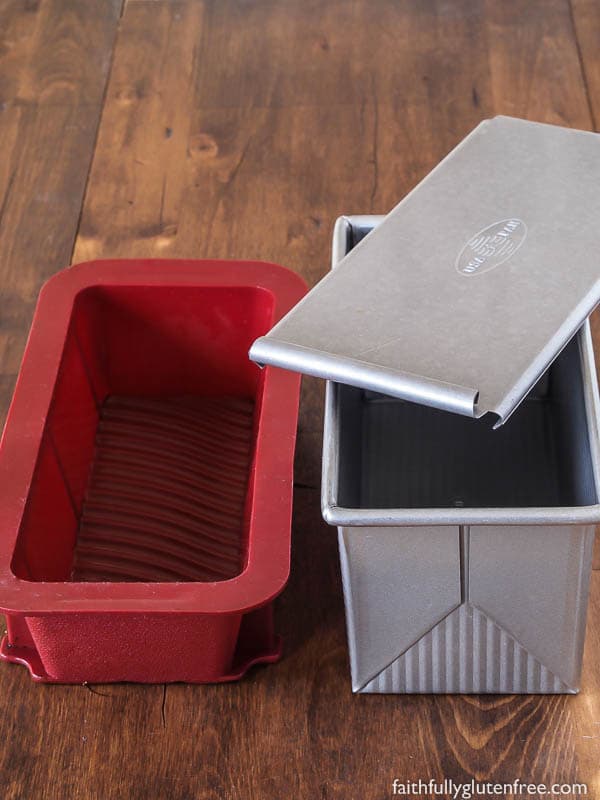
Silicone Bread Pan (left), Pullman Bread Pan (right)
The only downfall is that sometimes the bread decides to push out to the sides instead of up, giving you a bit of a rounder loaf instead of one that goes up. But, the good news is, it still tastes fantastic. I’ve been using (and reusing) these pans for a few years now, and they still bake up beautifully, and look like new.
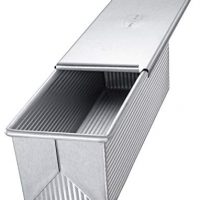
My new favourite bread pan is the 4″ x 9″ Pullman Pan by USA Pan. It is a heavy baking pan, tall, with straight sides. Once your bread has risen, you place the lid over the top of the pan, and bake your bread. It gives you a nice square loaf of bread, perfect for sandwiches. You’ll also notice that the top is nice and even, without any huge bumps. Another bonus is that baking the loaf in this pan gives you a nice thin crust, which I really prefer for sandwiches.
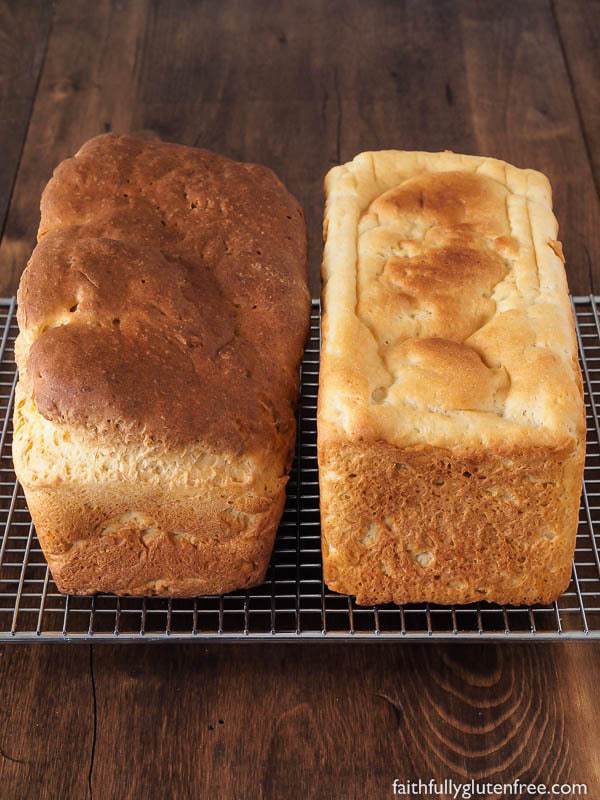
Bread baked in a silicone pan (left) and a pullman pan (right).
Here’s why this gluten free Millet Sandwich Bread recipe is now my go-to bread recipe:
- It is a very versatile bread, holding up to French toast (either frying pan style, or gluten free Baked French Toast), garlic toast, and a sandwich.
- It keeps fresh on the counter for at least 4-5 days (depending on your environment).
- I can quickly whip up a loaf of bread with ingredients that I regularly stock in my gluten free pantry.
If you bake bread often, you can save yourself time by mixing all the dry ingredients together in a resealable bag, storing it in the fridge until you’re ready to bake. Then when you want to bake a loaf of bread, just add the wet ingredients, and you’ll be baking in no time.
Notes & Tips from reader Annie on how to bake Gluten Free Millet Sandwich Bread in a bread maker:
Well we just took the bread out and my husband couldn’t wait to try it. Needless to say we sliced into it while still warm. AMAZING!!!! Especially with butter I took a pic and posted on my timeline…not sure if you can see it or not. I have the Zojirushi BBCC-X20 Breadmaker (NO gluten free cycle). I used the Quick cycle to knead, rise and bake the bread. I used your recipe without adjusting measurements. I did not warm up the milk or bring the eggs to room temperature because my bread maker has a Preheat programmed into the cycles.
That said I first placed all of the dry ingredients except the rapid rise yeast, into a separate bowl and whisked together until well mixed. Directly into the bread pan I placed milk, honey, cider vinegar, oil and eggs. I did beat the eggs together gently in a smaller bowl prior to adding to the wet. Then I added the premixed dry ingredients on top of the wet, and adding the rapid rise yeast on top. Select the Quick Cycle. Once Preheat has stopped and kneading begins stand by with a spatula and watch, scraping down the sides as needed.
Once kneading is done, take your spatula dipped in some water and use the back of it to quickly level off the dough on top. Then let the bread maker do the rest. Once it is finished baking I let the bread sit in the bread machine an additional 10 minutes on the warm cycle. After 10 minutes, remove from pan and let cool…that is if you can wait that long Hope this made sense. If you’ve got any questions let me know.
If you make the gluten free Millet Sandwich Bread with substitutions, or prepare it in your bread maker, please come back here and report your findings, so we can all learn from one another.
New to baking gluten-free bread? Check out this wonderful guide written by Megan of Allergy Free Alaska – The Everything Guide to Making Gluten Free Bread (plus Troubleshooting).
Gluten Free Millet Sandwich Bread Recipe:
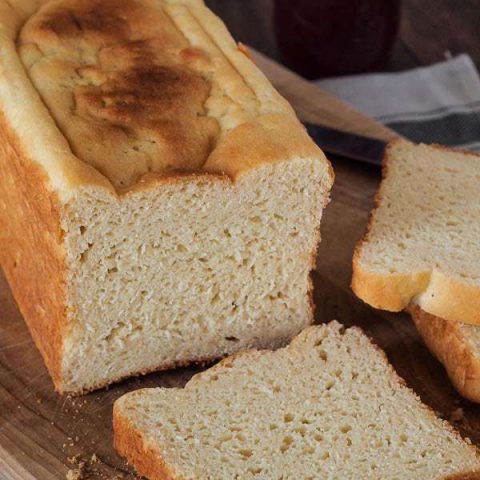
Gluten Free Millet Sandwich Bread
Unlike a lot of gluten free bread, this loaf is definitely not a brick! Light, squishy, it has the perfect texture, and holds up to being sliced quite well. If you dry it out after slicing it, this bread also works great for bread pudding and stuffing.
Ingredients
- 1 cup (250 ml) warm milk, about 100°F
- 2 teaspoons (8 grams) dry active or rapid rise yeast
- 1 Tablespoon (15 ml) honey
- 1 cup (150 grams) millet flour
- 1/2 cup (80 grams) brown rice flour
- 1/2 cup (95 grams) potato starch (not flour)
- 1/4 cup (30 grams) almond meal
- 1/4 cup (35 grams) tapioca starch/flour
- 1/4 cup (18 grams) skim milk powder
- 1 Tablespoon (10 grams) xanthan gum
- 1 – 1 1/2 teaspoons (4-6 grams) salt
- 1 teaspoon (5 ml) apple cider vinegar
- 1/4 cup (60 ml) canola oil
- 3 large eggs, room temperature
- 2-3 teaspoons (10-15 ml) sesame seeds (optional)
Instructions
- If using metal bakeware, grease and line the bread pan with parchment paper. If using silicone bakeware, you’re ready to go!
- Combine warm milk, yeast, and honey in a glass bowl. Stir & let sit 5 minutes. This allows the yeast to proof & shortens rising time.
- In the bowl of a stand mixer, combine the millet flour, brown rice flour, potato starch, almond meal, tapioca starch, milk powder, xanthan gum, and salt. Mix well.
- Add the apple cider vinegar, oil, and eggs to the yeast mixture. Whisk to combine.
- With mixer on lowest speed, slowly add the wet ingredients to the dry ingredients until combined. Scrape bottom and sides of bowl with rubber spatula. With mixer on medium speed, beat for 2-3 minutes.
- If not using a silicone baking pan, line the bread pan with parchment paper.
- Spoon the thick batter into the prepared 9″x5″ bread pan (I use a pan with 9.3″ X 4″ X 2.4″ Inches inside dimensions). If using sesame seeds, sprinkle them on now. Let rise, uncovered, in a warm, draft-free place for 30-40 minutes, or until dough has risen to the top of the pan.
- Meanwhile, preheat oven to 350°F. Bake bread for 40 to 45 minutes, or until the internal temperature of the loaf is 200°F.
- Remove bread from pan and place on a wire cooling rack immediately. Cool completely before storing in an air-tight bag.
Notes
TIPS:
I like to let my bread rise in a slightly warmed oven. Turn the oven on to 100 degrees F, and leave it on just until it gets warm (not hot) in the oven. Then turn the oven off, place the bread in the oven, and let it rise until nearly to the top of the pan (the amount of time this takes depends on how warm the environment is that the bread is rising in. Cooler temps = longer rise time). Remove the risen bread to preheat the oven before baking.
Use an instant read thermometer make sure that the bread’s internal temperature is 200°F. Under-baked bread will be gummy when you slice into it.
I generally remove the bread from the pan as soon as it comes out of the oven. I place the loaf, on its side, on a wire cooling rack. After about 10 minutes, I flip the bread to the other side. I find doing this helps the bread to keep a nicer shape once it has cooled.
Recommended Products
Disclosure: We are a participant in the Amazon Services LLC Associates Program, an affiliate advertising program designed to provide a means for us to earn fees by linking to Amazon.com and affiliated sites.
Wonder how this gluten free Millet Sandwich Bread would hold up if you made yourself a sandwich in the morning, and wanted it at lunch?
Yeah, I wondered that too!
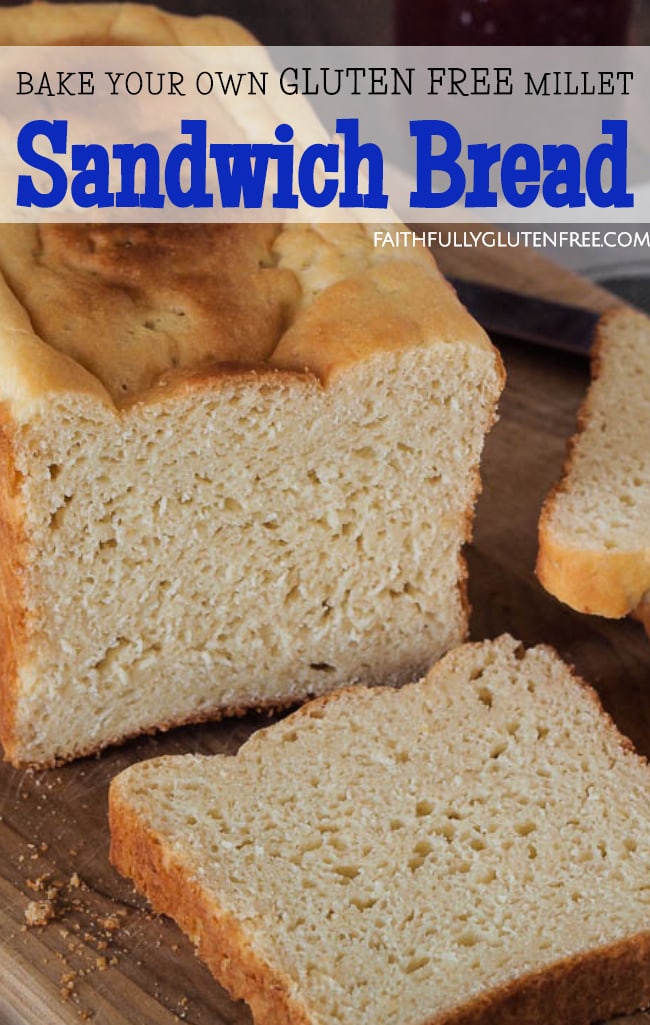
Don’t forget to PIN IT to your gluten free Bread Pinterest board:
Disclosure: We are a participant in the Amazon Services LLC Associates Program, an affiliate advertising program designed to provide a means for us to earn fees by linking to Amazon.com and affiliated sites.
The images were updated Feb 2018.

Tess says
Hi, This recipe looks wonderful! I’d love to try it, but need a suggestion for substituting the milk powder. We are a dairy/casein free household. Thanks!
Jeanine Friesen says
Thanks, Tess! Shirley has a great suggestion for the powdered milk a few comments down: Suggestion to Tess: Vance’s Dairy-Free Milk powder is great. And btw, it’s usually cheaper at your local health food store than it is on Amazon.
MARIANGELES says
HI JEANINE & TESS,
I USED COCONUT MILK POWDER INSTEAD. NOW, I WONDER WHAT IS THE PURPOSE OF THIS POWDER?
Tahani says
Hello,
I am lots of food allergies and rice is one of them… its unfortunate because a lot of gluten free meals and breads use rice. I was wondering what can I substitute for rice in this recipe ? Thank you so much!
Jeanine says
I would try using Sorghum flour instead of the rice in this recipe.
Renette says
Hi, this bread was delicious, it almost flopped as i used yeast that was expired and was worried when I left it to rise and a warm oven and arrived back home 1.5 hours later and it had not risen. I was horrified to see on the yeast packet that it was expired! Fortunately I had another packet in my cupboard which was fine, so I just plopped the dough back into my food processor and gave it a whizz with the new yeast and voila, it rose beautifully, I was so relieved not to have wasted all the ingredients! The bread came out lovely but did sink in a bit after taking out the oven, but still tasted delicious! My whole family raved about it. My first prize would be low carb, but at least this is gluten free. I am yet to find a low carb bread recipe that my kids want to eat more than once… and the other downside is that most of them are really expensive to make being based on almond flour at average 3 cups per loaf, really not affordable for a family of 6! I also don’t have a stand mixer, but got blessed with a food processor a few weeks ago and just popped everything in there with the kneading blade and did not come out too badly. a lot of my baking tends to fall when taking out the oven, any advice as to what would cause that? On Sunday I made gluten free scones and for the first time ever even they plopped down after they rose amazingly while in the oven ;( Looking forward to browse more of your recipes.
Lavanya says
Hi Renette,
I was so inspired by this recipe that I made some finger/pearl millet bread with minor modifications to this recipe. I am enclosing the ingredients here:
1 cup GF all purpose flour
1/2 cup pearl millet flour
1 cup finger millet flour
3 eggs
1 tsp salt
1 tsp sugar
11/2 tsp Guar gum
1/2 tsp Xanthan gum
2 tsp active dry yeast
1 tsp baking powder
1 big pinch baking soda
1 cup warm milk
1 tbsp honey
1/4 cup oil
1 tsp apple cider vinegar (ACV)
SP says
All purpose flour is THE most dangerous of all flours. If one wants a gluten free bread, this is to be avoided like the plague.
Jeanine Friesen says
It’s ok, she’s using an all purpose gluten free flour – so a blend of gluten free flours. Still contains no gluten, so it’s alright.
Renette says
I forgot to ask, what it the purpose of the milk powder? I never have milk powder in my house as it feels a bit artificial. I just threw in some of my son’s formula 🙂 Would like to know what it can be substituted for and what it does in the recipe? I bought a breadmaker a couple of years ago and returned it to the store when I saw all the recipes had milk powder in them… Thanks!
MARIANGELES says
I DON’T KNOW WHAT THE PURPOSE IS, BUT I USE COCONUT MILK POWDER. BREAD COMES OUT DELICIOUS.
Joy says
Milk powder adds moisture(holds in it) and adds creaminess to recipes
Lisa Fritz says
Has anyone tried this bread recipe with almond milk or another non-dairy milk substitute? I would like to try it but we are gluten, corn and dairy free. I don’t always have luck substituting due to protein and other differences in non-dairy vs dairy. I’d like to try in bread machine-any hints in substituting would be wonderful as I’m a pro at bread doorstops!
Diane says
Hi, is it possible to substitute cornstarch for the potatoes starch in this recipe?
Cathy V. says
Thank you Jenine 🙂 This looks like a great bread recipe. It’s on my to do list for tomorrow &I have all the ingredients in my gluten free supply cupboard!
Jeanine Friesen says
Thanks, Cathy! Let me know your thoughts when you try it!
Shirley @ gfe & All Gluten-Free Desserts says
That is beautiful bread, Jeanine! I love the taste of millet and with these other ingredients, I can just imagine how terrific this bread is. 🙂
Suggestion to Tess: Vance’s Dairy-Free Milk powder is great. And btw, it’s usually cheaper at your local health food store than it is on Amazon.
Shirley
Jeanine Friesen says
Thanks for the replacement suggestion, Shirley! Not having to be GF, I didn’t even know that existed. 🙂 And thanks for sharing as well, I appreciate it.
Christine Brigham says
No one can explain the reason for the milk powder??
Barbara R. Briody says
Photograph seems to show loaf topped with sesame seeds, but there’s no mention of them in the recipe. What quantity do you suggest [1 Tbsp or more?]? Are they added before rising, or just before baking? Inquiring minds want to know.
I’ve found a great G-F bread at Whole Foods [their own brand, Prairie Bread] but their nearest store is over 100 miles away, so when I make a “road trip” I stock my freezer with several loaves. A friend [celiac] is still looking for a good G-F bread; she misses the “mouth feel” of wheat bread. I’ve got the ingredients for this recipe, so may make her a loaf soon.
Thanks for all you do to provide a variety of good G-F recipes, and Happy New Year.
Jeanine Friesen says
Hi Barbara,
I’ve made it both ways, so forgot to include that option in the recipe. One pic does have sesame seeds, I’d use 2-3 teaspoons, and I sprinkle them on before the bread has risen. Great question, so I added the info to the recipe. thanks!
Mary @ Gluten Free Spinner says
Looks absolutely scrumptious, Jeanine! You’ve done it again my friend..nice job!
I’ll have to try soon.
Happy New Year!
Mary
Jeanine Friesen says
Thanks, Mary! Happy New Year to you as well!
Ellen (Gluten Free Diva) says
I totally agree about the stand mixer being crucial for gluten free baking. It’s definitely an investment, or maybe another way to look at it is that it’s an investment in your health! This bread looks divine and I can’t wait to try it!
Jeanine Friesen says
Thanks, Ellen! I really don’t know what I would do if I didn’t have my stand mixer when I started this journey. I probably would have given up on baking a long time ago!
Lu says
You have almond meal listed in ingredient list, but left out of instructions.
Will be trying this this weekend (alas, am currently out of xanthum gum).
Love trying your recipes, I appreciate your not using a premixed flour mix,
and your article on correcting GF cookie crisis.
Jeanine Friesen says
Thanks for catching that, Lu! I’ve edited the post to reflect when the almond meal should be added. 🙂 So glad that you’re enjoying the posts as well – thank you!
Marilyn @ Pink Paper Cottage says
Is the almond meal a “meal” or flour? Can you buy the almond meal or do you have to grind it yourself? I’m excited to try this recipe but don’t have a stand mixer. It is on my “wish list” but don’t know when I’ll ever be able to afford one! I want to make my own breads as buying them at $5 or $6 a loaf is just horrible, in my opinion. I admit, the GF breads out there now are much better, but still so expensive. I guess instead of paying around $20 a month for breads, I could save it for a stand mixer!!! I do love the taste of millet flour and use it in alot of my cookie and dessert recipes, as it does give them a really good flavor. Thanks for all the wonderful recipes! (and I may be stalking Goodwill and other donation-type stores for a stand mixer!)
Jeanine Friesen says
You can use either almond meal or almond flour. Meal is a little chunkier, and still has the skin on, if I’m right, where flour has the skin removed, and is ground a little finer. You can buy it in stores, I get mine where the other GF flours are sold, but quite often it is in the fridge to keep it fresher longer.
Definitely start saving your pennies, a stand mixer makes baking so much easier! And there’s nothing wrong with used either, sometimes the classifieds have them listed too!
Lycia says
Is it possible to replace almond meal? because we have someone with nut allergic.
Susan says
I am looking forward to testing this recipe.
As you asked, I do not use silicone bakeware as I am a little scared of it…I don’t like cooking in plastics. I do have silicone muffin tins which i always line.
I have used ceramic coated bakeware and pots and I really like them. I am gradually building my collection as it is a little pricier.
Jeanine Friesen says
Have you tried any of the ceramic coated bakeware, Susan? I just bought myself a ceramic coated frying pan and love it, that’s what got me thinking about the bakeware. Maybe the next time I’m out I’ll have to invest in one pan to test out. 😉 Thanks!
Annie says
Well we just took the bread out and my husband couldn’t wait to try it. Needless to say we sliced into it while still warm. AMAZING!!!! Especially with butter I took a pic and posted on my timeline…not sure if you can see it or not. I have the Zojirushi BBCC-X20 Breadmaker (NO gluten free cycle). I used the Quick cycle to knead, rise and bake the bread. I used your recipe without adjusting measurements. I did not warm up the milk or bring the eggs to room temperature because my breadmaker has a Preheat programmed into the cycles. That said I first placed all of the dry ingredients except the rapid rise yeast, into a separate bowl and whisked together until well mixed. Directly into the breadpan I placed milk, honey, cider vinegar, oil and eggs. I did beat the eggs together gently in a smaller bowl prior to adding to the wet. Then I added the premixed dry ingredients on top of the wet, and adding the rapid rise yeast on top. Select the Quick Cycle. Once Preheat has stopped and kneading begins stand by with a spatula and watch, scraping down the sides as needed. Once kneading is done, take your spatula dipped in some water and use the back of it to quickly level off the dough on top. Then let the breadmaker do the rest. Once it is finished baking I let the bread sit in the breadmachine an additional 10 minutes on the warm cycle. After 10 minutes, remove from pan and let cool…that is if you can wait that long Hope this made sense. If you’ve got any questions let me know.
Jeanine Friesen says
Ah, Annie, I am SO glad that you tested this in your bread machine right away! Thank you so much for sharing with us how it worked, and how you did it. And, I’m glad that you guys loved the bread too – Yeah!! 🙂
Wild Child says
Annie – thank you so much for sharing your results in the bread machine! I have the exact same bread machine so I truly appreciate your notes. Jeanine, this bread sounds wonderful! In my three years since diagnosis I have never baked a yeast bread. Scares the heck out of me!! This just might happen now. I want French toast and this might be my vehicle there. Thank you both!
Jeanine Friesen says
Do it! 😀 Yeast bread isn’t really scary at all – you can do it. 😉
Pat says
Another great recipe, Jeanine! In the past week have enjoyed your rolled sugar cookies, peanut butter cookies and crispy gingersnaps! All winners! I was unable to find non-instant skim milk powder, so sub’d whole milk powder. Have you tried instant skim milk powder? I would prefer to use that if it works.
I also appreciate that you include weight measures in addition to volume measure – thanks for going that extra step for us!
Also – thank you, Annie, for sharing your instructions for this recipe to be baked in the Zojirushi BBCC-X20 Breadmaker – I followed your instructions in my Zo (same model), and used the dark crust setting – turned our perfectly!
Much thanks to you both.
Susi says
I’m wondering why you don’t have to proof the yeast using the bread machine? Is it because of the rapid rise yeast or would the dry active work just as well? I use SAF Instant yeast. I have a Zo BB-PAC20 that I just acquired and am not having good luck so far. I tried the GF setting and I tried the programmable setting.
Are there more recipes that have worked well for you in your Zo on Quick bread setting?
Michelle @ My Gluten-free Kitchen says
This bread looks great Jeanine! I can’t wait to try it!
Jeanine Friesen says
Thanks, Michelle! I hope you enjoy it. 🙂
Amy M says
Maybe I missed it, I admit I was skimming through…would you mind telling me about how many days this bread would stay fresh enough for sandwiches? Thanks!
Jeanine Friesen says
Hi Amy, I didn’t include that in the recipe, but I’d think 3 days on the counter the bread would still be good. You can always slice it, and freeze a few slices together to make the bread stay fresh longer. That way you just take out what you need.
Amy M says
Thank you! It probably won’t last 3 days here anyway with growing kids, but it is helpful info for traveling etc.
Jeanine Friesen says
Mine’s on day 5 now – still soft & squishy (and not moldy – phew!) 😉
Sherrie says
3 questions:
Can I use rice milk?
Is the skim milk powder necessary?
Is there a substitute for the almond meal (allergic)?
I just got a bread maker with a gluten-free cycle that I’m looking forward to trying.
Jeanine Friesen says
Hi Sherrie. You can use a dairy-free alternative, I’m sure it’ll work without a problem. I have only made the recipe as written, so i’m not sure how eliminating the almond meal will affect it. I would suggest more milk powder, but since you want to eliminate that too, I’m not sure. I wonder if it would work to pulse sunflower seeds with some of the flour mixture (to prevent it from becoming a butter), and use that in place of the almond meal? Have you ever tried that? If you do try this recipe, please come back and let us know what changes you made and how they worked for you. 🙂
Tina G says
I noticed the almond meal mentioned in the ingredients but not in the directions. Is it necessary to use? I would like to make the bread today but don’t have almond meal. 🙁 Is there a suitable substitute?
Jeanine Friesen says
Hi Tina! If you don’t have the almond meal, go ahead and give it a try. I really like the flavour that it adds to the bread though.
Megan | Allergy Free Alaska says
Jeanine,
That’s a gorgeous looking loaf of bread!! I love your big fat slices of it – makes me want a piece BADLY!
Hugs,
Megan
ps-And thanks for the shout out!!
Jeanine Friesen says
Thank you, Megan! There is nothing quite like a still warm slice of bread. Mmm….
Alice Theofan says
Excited to see another bread recipe! I know this one will be as wonderful as the others. My only question is, will it strong enough for French toast? My hubby is dying for a nice fast slice for breakfast but all the other breads just fall apart in the eggs mixture. I’m going to make a loaf and see what happens. Don’t know if you don’t try! LOL! Thanks again!
Jeanine Friesen says
Alice, I think this would hold up to french toast. I made a make-ahead baked french toast, and it was beautiful! For regular french bread, cut it a little thicker, and don’t let it soak too long, I think it would work! Might be supper tonight to find out for sure. 😉
Jessica Canfield says
I am going to try this for sure! I use my pampered chef stone wear loaf pans and I love them! Very even cooking and it never sticks to the pan when I spray canola oil and flour it a bit. They are spendy as well, but worth the investment. Thanks for the new recipe!
Jeanine Friesen says
I’ve heard so many great things about the pampered chef stones. I have a little brownie pan that I won, but haven’t used it yet. Eek! I should. One day… 😉
Vanessa Wiens says
Thank you for a fantastic bread recipe! I omitted the dry milk powder, as I didn’t have any. I also used 1/2c buckwheat flour & 1/2c flax meal in place of the millet, as I didn’t gave that either. Turned out fantastic! Baking more tomorrow!
Jeanine Friesen says
sounds great, Vanessa! Thanks for letting me know what worked for you!
GwenH says
Really good!! Rose nicely and even came out of the over looking as nice as a gluten filled loaf of bread.
Jeanine Friesen says
Yeah!! Love to hear that, Gwen! It is a pretty bread, isn’t it? 🙂
MillieH says
This looks wonderful! Just recently having to go GF, and I miss sandwich bread so much! Is there a substitute for tapioca starch/flour? I have potato starch and potato flour, or unflavored gelatin maybe? I really want to make this bread!!!
Jeanine Friesen says
Hi Millie! I would use cornstarch in place of the tapioca starch, since you probably have that in your pantry as well. Good luck!
Sherrie says
Jeanine,
I made this bread and it came out fabulous! I have a new breadmaker with a gluten free setting. I followed many of Annie’s suggestions on using the breadmaker. You asked me to let you know what substitutions I made. I used rice milk for the milk, I used fresh ground flax seeds for the almond meal, for the skim milk powder I used an additional 2 tbs of ground flax seed. I put all the wet ingredients in first, then the salt followed by my flours which I whisked together in a bowl, lastly I put the yeast on top. I did use a rubber scraper during the mixing and the kneading cycles to help mix in what was on the sides. I did not heat my milk. I wish I could post a picture. Love how soft and tasty this bread is and how it holds firmly together 🙂
Jeanine Friesen says
I am so thrilled that this recipe is working for bread makers! So glad to hear that, Sherrie, and so thankful that Annie shared her tips & tricks with you guys, since I don’t have a bread maker. Love that it also worked to make it completely dairy-free, thank you so much for letting us know!
Jean says
Following the recipe to a T, it is in the bread machine now. The dough was very sticky. Is this normal? I’m hoping it bakes into a nice loaf….love the recipes, thank you !
Jean says
Just ate a slice and It turned out perfectly!!! Thank you so much for this amazing recipe. So easy and delicious in the bread maker <3
Jeanine Friesen says
Perfect!! I’ve heard it works well in the bread machine, but don’t have one to try it out. Gluten Free bread dough is much wetter than regular bread dough, more like a thick cake batter. Thanks for the feedback!
Cathy V. says
Jeanine, I made your Millet Bread yesterday & absolutely love it! First time I’ve been able to have a hot chicken sandwich without everything falling apart & crumbling! I couldn’t wait until supper to try it, so had the crust with some sliced cheese while it was still warm…umm umm good. I rate all my recipes before I put them into my gluten free binder & gave this one 5 stars! It was so simple & easy to make!
Thank you so much, I find your recipes turn out the best & taste the best 🙂 The Millet bread will be the only one I make now!
Jeanine Friesen says
Thank you so much, Cathy! That really means a lot to me. 🙂 So glad to hear that you’re enjoying the recipes. I’ve been playing with this bread lately too, I’m really liking it, so glad that others are as well!
J L says
Made this a few days ago, DELICIOUS!!!!! Even the gluten eaters in my house gobbled it up! I used a ceramic bread pan and it worked beautifully 🙂 Thanks for another great recipe!
Jeanine Friesen says
Wonderful !! Thanks for letting me know, J L! 🙂
Barb says
I made this 4 days ago and it is still soft and fresh tasting. I love that you gave the weights as well as the volume. I do this with every new recipe that I try so that, if it’s a keeper, I never have to get out the measuring cups the next time I make it. Thanks for not using an exclusive “blend” of flour. I like using different ones.
Jeanine Friesen says
Thanks, Barb! So happy to read that you’re happy. And you’re right, I have some that is 4 or 5 days old as well, and still soft! 🙂
Kerstin says
I am soooo excited!!!! It’s in the oven with another 15 minutes to go an it just looks fantastic. My fingers hurt from keeping them crossed as I really really want this to be the one that looks AND tastes good. My 5 year old has been diagnosed with celiac disease 1year ago and I haven’t been very successful in baking a bread that she really likes. So please, let this be THE ONE.
I love your site and will definitely try more of your recipes, the cinnamon roles being next on my list. I even bought some cup measures as we live in Germany and I normally don’t do cups. Only noticed afterwards that you had provided the grams with this recipe as well. Saying that, my daughter and I had fun with our new, colourful cups 🙂
Nearly time to get it out. I will get back to when we have tried it. Thank you for all your ideas, advice and recipes.
Jeanine Friesen says
I hoped that the recipe was given two thumbs up by your daughter, Kerstin! I’ve started adding the weights to the bread recipes that I make, mostly because I think bread is the one thing that can go really wrong if you have too much or too little flour. That’s great that you have measuring cups now though, since most of the cakes & cookies don’t have the weights. 😉
Andrea G. says
I’ve just finished proofing this bread and wow it rose! So far I’m impressed. I did substitute almond flour for the ground almond meal. Oven is pre-heating now and my hopes are high. I’ll report back once we’ve had an opportunity to tear into it 🙂
Alma says
Jeanine, the only good thing about our cold Ohio winters, it currently is 10 degrees, is it makes me want to get into my kitchen and bake. Makes my husband happy too.
I just found your millet flour bread recipe. I saw the comments about using a bread machine. I have a bread machine that I have been using at least twice a week for baking bread. So, I made the recipe both ways. The pan I used for the oven method, I had purchased at King Arthur Flour. It is for baking GF bread, has taller sides, and it turned out perfect. Really, picture perfect. The one in the bread maker wasn’t as tall as my old recipe, but that recipe has more ingredients in it. So all in all, this was a very successful baking day. Can’t wait to taste it. My kitchen smells amazing.
Jeanine Friesen says
Sounds great, Alma! Glad that you had success with it both ways!
Alice Theofan says
Once again you rock!!! I did find the Millet Flour on Amazon and it was here with in days. Couldn’t wait to try this bread and make the long dreamt of French Toast for my husband! It was a hit to say the least. He says that it tasted like good old fashioned French Toast from Pre Celiac days and it didn’t “melt” when it was in the egg bath! I’m thinking he just might move in with you soon. You seem to know exactly what craving he is after! LOL! As I write this, I have a batch of buns rising. I’ll let you know how they come out. Thanks again for being such a fantastic GF genius!
Jeanine Friesen says
Doesn’t it make amazing french toast, Alice? I didn’t lie to you! 😀 Haha, I’ll charge him rent if he moves in, how’s that? 😉 Glad to hear it’s a hit.
Noel says
Hi, I’ve been making gf bread for several years in a bread maker, but I am uncomfortable with the non-stick pan so I am going to try baking it in a crock pot or the oven. I have a very simple gf recipe because I have so many food intolerances.
1 1/2 cup of millet, white rice flour or any other gf flour, but if you use rice flour use 1c of rice flour and 1/2 c some other, I use millet.
1 1/2 cups tapioca flour
3 tsp. organic sugar
1 tsp. Celtic salt
1 tbl. xantham gum
Mix thoroughly
1 1/2 cup of water or milk.
1 pkg regular yeast
Pour water or milk into the bread pan
Spoon flour mixture over liquids carefully so they sit on top of the liquid, make a spoon indentation in the middle for the yeast and pour the yeast into it.
I use the quick bread setting which takes 58 minutes
Once the kneading begins you want to scrape down the sides of the pan.
I usually take the paddle out so it doesn’t leave a big hole in the bread later.
Now I am going to try making this bread in a crockpot.
Jeanine Friesen says
Thanks for the recipe, Noel! If you try this in the crockpot, please let us know how it worked for you!
Noel says
I made the bread in my 6qt crock pot in a USA bread pan with the silicon lining and it turned out well. It didn’t rise as much as it did in the bread maker, but I love it that I don’t have to use the teflon pan any longer. It took about 2 1/2 hours and I finished it off in the toaster oven under the broiler for a few minutes to brown the top.
Jeanine Friesen says
Great to hear! I’ve never tried this loaf in the slow cooker, glad to hear you had success with it!
MARIANGELES says
HI NOEL,
THANK YOU FOR POSTING YOUR RECIPE. I LOVE SIMPLE RECIPES WITH FEW INGREDIENTS, AND IT SEEMS THAT GF BREAD RECIPES ALWAYS HAVE A TON OF INGREDIENTS.
ALSO, I’VE BEEN LOOKING FOR A MILLET BREAD RECIPE THAT HAS MILLET AS THE MAIN FLOUR, WITH ONLY ONE OTHER FLOUR. I’LL DEFINITELY TRY THIS ONE IN MY BREAD MACHINE. NOW, I USE COCONUT MILK INSTEAD OF WATER OR DAIRY MILK, GREAT FLAVOR!
I NOTICE THAT YOUR RECIPE DOESN’T INCLUDE ANY EGG SUBSTITUTES, GUESS THEY’RE NOT NEEDED, AND THAT MAKES IT EASIER. I USUALLY USE EITHER 1/2 MASHED BANANA OR 1/4 CUP APPLESAUCE WHEN IT CALLS FOR EGGS.
THANKS AGAIN. AND HAPPY BAKING FOR ALL!
shalindhi says
Hi Jeanine,
So I baked the Millet Bread and followed your directions to the letter; however:
I measured my pan and it was wider than yours by about an inch.
The bread baked up beautifully, smelled wonderful and looked great. I took the temp and it was 200F. I took it out of the pan right away to put on its side on the rack. Unfortunately the sides and bottom were bowed in.
What would you suggest?
Thanks!
C says
I have made this bread numerous times with great success, but the last time I made it bowed also. I have been afraid to make it again! HELP
Carol says
I am printing this as I leave this reply. This appears to be the healthiest gluten free bread I’ve come across! There is ONE problem for me though; it’s the canola oil. I do not use it and, since I couldn’t remember why other that it’s “bad”, I researched it. CANadian Oil Low Acid – cheap, genetically engineered plant, contains trans fatty acids and comes from the rapeseed plant. Don’t believe me? Check it out online yourself. I will replace it with peanut oil.
Sheryl says
Please don’t believe any of this. We grow canola – different then rapeseed – and use it all the time. You can certainly do your own research, and should, but use a reputable source.
Erika says
I just made this recipe with a few substitutions and it came out quite yummy. I have a grain mill so I used all freshly ground flours. I used oat flour instead of the tapioca and potato starch and quinoa flour instead of the almond meal. It’s now my favorite gluten free bread 🙂
Michelle says
Hi Jeanine, I’ve been making your recipes for a few months now but have yet to post. This is my family’s favorite bread by far! Two of them don’t have to eat gluten free, but they love this bread so much, I quit buying them their own and we all eat this one. We also like your other sandwich bread – the one with psyllium. I was wondering if you can fix the “Print” option for the Millet Bread? The recipe doesn’t come up just the title. I can print your other recipes except for this one. Thanks so much for sharing your recipes.
Michelle says
Make that the Flax seed meal bread (not psyllium!).
Joanne Peterson says
Hi Jeanine,
I baked bread for years before my husband had to go gluten free and dairy free. I am finding it a disadvantage other than understanding how yeast works, and what it can do. It is so radically different, and almost counter-intuitive to gluten baking!
This recipe for millet bread sounds very delicious with the ingredients you have listed. I’m am wondering what the milk powder does in this recipe? Is it for flavor, keeping quality, texture, the crust? I am asking because I need to substitute the dry milk powder and I am working on figuring out which direction I should go for my husband’s needs. I have a couple of ideas based on the end goal with the milk powder.
Could you please advise if this post is not too old? If it is too old, I certainly understand because you can’t be everything to everybody 🙂
Sincerely,
Joanne Peterson
Jeanine says
Hi Joanne! You’re right, it is a completely different way of baking than wheat-based breads. But, once you get the hang of it, it’s not that bad. 🙂 There are some dairy-free substitutions in the comments above. I use it to add some richness and protein to the dough, but I think you could have a successful loaf without the powdered milk as well. Hope this helps!
Joanne Peterson says
Thank you so much Jeanine! I will really look through the comments carefully since I skimmed them and missed the dairy free comments. I will let you know what my results are baking the bread dairy free and skipping the milk powder. 🙂 I will take the time for the learning curve. Thanks for the encouragement.
Joanne
Kim says
Has anyone tried this without the eggs? Also
Need to omit the almond also. My son 4yrs is egg wheat, peanut, tree nut allergic. Looks solo good!!
Jeanine says
Hi Kim, I don’t have much experience with replacing eggs, so I asked on facebook if anyone had baked this loaf this way, but no response there. Sorry! There is a lot of great info on substituting eggs here though: http://www.forkandbeans.com/2013/11/22/guide-egg-substitutions/
As for the almond meal, replacing it with ground flaxseed should work without a problem, or an extra 1/4 cup dry milk powder should work too.
If you do have success in making this without eggs, please come back and let everyone know how it worked, I’m sure others will have the same question. 🙂
MARIANGELES says
HI KIM,
I DO OFTEN BAKE WITHOUT THE EGGS. THERE ARE DIFFERENT EGG SUBS OUT THERE. YOU EITHER GET “ENER-G” EGG REPLACER POWDER AND FOLLOW INSTRUCTIONS FOR REPLACING THEM. OR YOU CAN USE EITHER 1/2 A BANANA OR 1/4 CUP APPLESAUCE OR 1/4 CUP BLENDED TOFU PER EGG. YOU CAN ALSO USE 1TBSP FLAX SEED MEAL & 3TBSP WATER. THEY ALL WORK WONDERFULLY. I PREFER THE FRUITS BEC. THE FLAVOR IS SUPERB.
FOR THE ALMOND MEAL YOU CAN REPLACE IT W/ EITHER FLAX SEED MEAL OR HEMP SEED MEAL OR SESAME MEAL (OR GRIND THEM YOURSELF IN FOOD PROCESSOR).
DAIRY MILK IS BETTER TO SUBSTITUTE W/ COCONUT MILK OR ANY OTHER NON DAIRY MILK. COCO MILK GIVES IT A DELICIOUS RICH FLAVOR.
ENJOY.
Shirley says
Thank you so much for all your wonderful recipes, I always know that I can count on your recipe to work so they are always my go-to.
This Millet bread recipe is wonderful I love it. It always raises high above the pan, but after I take it out of the oven and put it on the rack, the sides fall in. Am I not baking it long enough maybe, or maybe I have to cut back on my yeast, what are your thoughts? Thanks
Jeanine says
Hi Shirley! So glad that you like this bread – it’s still my favouite. I think you could either cut back on the liquid a little, or bake it a little longer to stop the falling. There are so many factors in bread baking, including humidity, etc. Here’s a great resource on troubleshooting your GF bread baking, lots of great ideas:http://www.allergyfreealaska.com/2013/05/06/the-everything-guide-to-gluten-free-bread-including-troubleshooting/
MARIANGELES says
HI JEANINE,
THANKS FOR POSTING YOUR RECIPE, WISH I HAD SEEN IT YESTERDAY BEFORE I BAKED MY BREAD LAST NIGHT. I GOT YOUR LINK TODAY FROM SHIRLEY, I ASKED HER TO GET ME A MILLET BREAD RECIPE FOR BREAD MACHINE.
ANYWAY I VENTURED ON MY OWN AND DID BAKE A MILLET BREAD SUBSTITUTING THE RICE FLOUR FOR MILLET AS THE MAIN FLOUR AND JUST ADDING 1/2 CUP TAPIOCA AND 1/2 C SORGHUM, AND OF COURSE THE POTATO STARCH.
SO IT WAS VERY SIMILAR TO YOURS, EXCEPT I USE FLAX OR HEMP MEAL INSTEAD OF ALMOND AND I DO OFTEN BAKE WITHOUT THE EGGS, SO I USED 1 BANANA FOR 2 EGGS AND 1/4 CUP APPLESAUCE FOR THE OTHER EGG. (THERE ARE OTHER EGG REPLACERS, THEY ALL WORK WONDERFULLY, I PREFER THE FRUITS BEC. THE FLAVOR IS SUPERB).
I ALSO SUBSTITUTE DAIRY MILK WITH COCONUT MILK, AND THE OIL I USE IS COCONUT OIL (CANOLA IS TOXIC).
ALL MY INGREDIENTS ARE ORGANIC TO PRODUCE A TRULY HEALTHY ORGANIC BREAD.
NEXT WEEK I’LL TRY YOUR RECIPE W/ ORGANIC INGREDIENTS AND OF COURSE WITHOUT THE CANOLA OIL. I ALSO WANT TO TRY NOEL’S RECIPE AS IT LOOKS VERY EASY, SIMPLE AND FAST. HAVING TO EAT GLUTEN FREE AND ELIMINATING OTHER “NORMAL” STUFF FROM OUR DIETS MANY TIMES TURNS INTO A BIG PRODUCTION, THEREFORE, I NEED TO SIMPLIFY.
THANKS AGAIN AND CONGRATS FOR A GREAT WEB PAGE!!!!!!!
Patricia Phypers says
Love this bread. It is also my husband’s favorite gluten free bread.
Just wondering what the calorie count is per loaf?
Enjoy your site so much and make many of the recipes with great results.
Leah says
We love the flavor of this bread! It rises well, bakes up beautifully. However, it consistently sinks withint a few minutes after we pull it from the oven. Any particular tricks to avoid this? We follow your recipe and instructions (except your tip to rise in a warm oven instead of on the counter in a warm place). We have tried baking it for up to 45 minutes and it still falls in the middle. Any tips?
Heidi says
I wonder if people are over-rising this “bread”, as the same thing happens to over-risen gluten (yeast) breads. I would say to be careful and only let it rise to the top of the pan as per instructions.
alice theofan says
HI Jeanine!
I made this bread AGAIN….always a hit with the boys . I rose beautifully. I was so nice in the over and when I took it out it began to fall! I took its temp and it said 202 degrees. Should I have baked it a bit longer? I had a little foot stomp and ERRRGH! LOL!!! Hopefully it still cuts nice!
alice theofan says
IT rose Nicely and IT looked so nice in the oven!! (spell much?) LOL
Angie says
Wonderful recipe! I made it today. I subbed coconut oil for the canola, almond flour instead of the dry milk powder and almond milk instead of the regular milk. I also cut back to two teaspoons xanthan. Yay…a keeper! Anyone tried freezing it? I doubled the recipe.
Cheryl says
I have frozen this bread several times. I slice it, wrap slices individually with clear wrap and place all in a large freezer bag. I microwave 2 slices (with clear wrap in tack) for about 30 seconds (15 seconds then turn slices over for another 15). It always taste as if I had made it that day. I have left in freezer for up to 6 weeks with no diminished quality.
Jeanine says
Awesome! Thanks so much for chiming in, Cheryl! Sounds like the perfect way to freeze (and reheat) it!
Tami says
Hi Jeanine, can I not use tapioca starch but instead increase potato starch amount?
Can almond meal substituted with some other ingredient or just skipped?
Can I use coconut or flax oil instead canola oil?
And can I use coconut liquid milk instead milk powder or can I not add any milk at all?
Thank you.
Michelle says
Thank you for this recipe!! It worked out beautifully. I opted to use your measurements for perfect results, so thank you for including the weights in the recipe. Also I used a cast iron bread pan that I just oiled and the bread came out without any problems. It did not sink. I am thrilled! Also thanks for the tip on internal temperature! I will use that for all bread recipes from now on. I used grapeseed oil instead of canola oil and it worked fine. Next time I may try olive oil for a nicer flavour. Thanks again!
Lele Smith says
I made this bread following the recipe except using a 9″x5″ loaf pan. It looked beautiful coming out of the oven and smelled devine! It did sink a little, so I was afraid it would be gummy – but no, it was perfect! It has great flavor – and my husband, who won’t touch my gf breads, said it was really good!!
This will be my “go to” bread now. Much better than the tasteless rice flour breads. Thanks!
Jeanine says
Sounds great, Lele! Ohh… a seasoned cast iron bread pan. I’m jealous!
Patrice says
Is there a substitute for the xanthan gum or guar gum, I can’t tolerate them?
Jeanine says
Patrice, you can try subbing 1-2 tablespoons of ground psyllium husk, but I haven’t tried it in this recipe, so I can’t say exactly how much. If you do, please let me know how it works for you!
Patrice says
Thank you. I’ve done a bit of research and may try a flaxseed slurry. I’ll let you know how it turns out.
Josie says
I was worried about making this because you recommend a stand mixer and I almost felt like I had to run out and buy one but I’ve already invested hundreds of dollars in this gluten free journey we just started for my son a month ago. I didn’t want to spend $200 on a loaf of bread that may or may not turn out.
Anyway, I finally just made the bread with what I had, a cheap hand mixer (I think I got it for my wedding 10 years ago actually) and it worked fine and didn’t seem to stress the motor at all.
I used water instead of milk because it already called for powdered milk so I didn’t see a reason to add more than that.
The bread has a very rich flavor and is not like gluten bread, but I like it and I think my son will grow to like it because I will keep making it. Tonight we will try using it for French toast.
Thanks!
Jeanine says
Thanks for the review, Josie. The milk plus milk powder helps to boost the amount of protein in the dough – gluten-free bread needs more protein added to give it a better texture. Glad to hear that your mixer worked well. And you’re right – it’s not like wheat bread, nothing will be because it lacks gluten, but it’s pretty tasty, I think. Hope your son agrees! 🙂
Karen says
Is it possible to modify this so it’s yeast-free (need to avoid)?
Jeanine says
That would require some testing, as I’ve never made bread without yeast before. Here are a few yeast free bread recipes from some friends though: http://www.allergyfreealaska.com/2010/08/17/yeast-free-flatbread-pizza-crust-dinner-rolls-hamburger-buns/
http://glutenfreeeasily.com/bountiful-bread-basket-top-20-gluten-free-bread-recipes/ (search for yeast free, there are a few)
Hope this helps!
Karen says
Thanks, Jeanine!
I found lots of good recipes from the links sent. Such a process trying to find one recipe that can meet all of my allergy needs!
Karen
Jeanine says
Awesome! You should peek around Gluten Free Easily’s site – she has numerous bread round ups – the last one had 65 loaves! Something for everyone. 🙂
Mandi says
I just found this recipe after happening upon $1/pound millet flour at my local grocer. I didn’t have potato starch so subbed the same weight of sweet rice flour and used two smaller loaf pans rather than a 9×5 (I need to get a silicone one like yours) but otherwise stayed with the recipe. Overall I was really impressed by the bread. Mine turned out a little more gummy than I like so next time I won’t use sweet rice flour and I’ll try using less xantham. I loved the added texture of the almond flour; I’m thinking a handful of whole grain millet (soaked so it doesn’t take water from the rest of the bread) would be a great addition.
Thanks for a great recipe!
Jeanine says
The sweet rice flour will make it quite a bit stickier, Mandi. Definitely try it with the potato starch (not potato flour – that’s a whole different beast), and I think you’ll like the results. 🙂 I’m sure the soaked millet (drained), would be a great addition!
Mandi says
So I’ve been playing with the recipe and have reached breadmaking nirvana. Your recipe is fantastic! Adding millet grain was not the right direction so I nixed that idea. I still don’t have potato starch (I’ll get some from Ener-G Foods the next time I’m in Seattle) but subbing equal weight sweet potato starch is a perfect substitute. Halving the xanthan gum to 5 grams took away the gumminess but still had structure and elasticity. Now I just need to try doubling the recipe to make enough to freeze….
Jeanine says
nice! Glad to hear that, Mandi! 🙂
Diana says
I just like to say this is one of the best breads I have tried. I have made many failures and this bread was so good it was not gummy or wet and did not need to be toasted. I used the cup and grams measurements and my cup of millet flour only weighted 120 grams but the recipe was thick enough so I did not add the extra 30 grams. All the other flours matched in weight. I don’t like to use to much xanthan gum so I reduced it to 2 tsp and added 1/4 tsp of pectin. I also increased the vinegar to 1 Tbsp and added a tsp of baking powder. It came out so beautiful and it tasted wonderful! My breads always seem to sink in the middle or come out wet and gummy and this bread was just like regular bread or what I remember it was like. Thank you so much for this recipe. I plan try to make hamburger buns with this recipe for a weekend bbq. Thanks again my family loved it.
Jeanine says
I’m so glad to hear that, Diana! After that one, I’m not sure what kind of bread recipe to develop, since it is also my favourite. Great substitutions – thank you so much for listing them, I appreciate it. I haven’t tried it as buns, but I know others that have. Report back with your thoughts on it as buns, OK?
Cinda says
I love your Millet Sandwich Bread – alas it consistently sinks after baking. I’ve tried decreasing the liquid, but the bread still sinks and the bread ends up too dense. I proofed the yeast, so I know it is good. I’ve baked it both in the standard oven and a bread machine, increased the bake time and tested the temperature so that is is between 200-210 degrees F. Any other suggestions? Thanks! Cinda
Jeanine says
Hmm… I’m still going to suggest baking it another 5-10 minutes. Maybe your thermometer is off? I found out this last holiday season that mine aren’t accurate. Grrr…
Eric C says
I have been diagnosed Celiac and gluten free since June of 2015. This is the FIRST bread I have been able to make that has turned out not only as intended, but was DELICIOUS! That weird aftertaste so many store bought gf breads have, or even some home made ones, NOT here. I have made other breads in the past that looked pretty, but had a bit of an off taste or just were not good on their own. This bread had the smell I missed, had a wonderful moist, open and delicate crumb, and the taste was amazing. I immediately made a turkey sandwich which was fantastic. Cannot wait to see how well the bread ages as I am so tired of immediately freezing bread and thawing all the time.
I left the loaf whole, slicing only what I needed, and placed in a paper bag, standing the loaf cut side down – hopefully that will help it stay good to eat for a while?
Thank you for this recipe!
Jeanine says
So glad to hear that, Eric! This is my favourite loaf to date too. Holds up well to toasting, grilled sandwiches, french toast, or just a sandwich that you packed hours before. I always leave it on the counter, in a resealable bag. I’ve never tried a paper bag, not sure if that would cause it to dry out faster? I’d be interested in hearing how that worked for you!
Julie says
I just made this bread and it is awesome! I made a few changes…instead of tapioca (I can’t eat) I used arrowroot, I added a tablespoon of sugar to the dough, I used buttermilk powder instead of skim milk powder (which I could not find), instead of almond flour (which I ran out of) I used spelt flour, and instead of canola oil (I can not eat) I used a very light tasting olive oil. I can finally eat a bread that I am not choking on throughout the meal with 2 cups of a beverage! I can’t wait to make french toast! I will also use this for a hamburger bun just like my mom used to do before they made hamburger buns. : ) Very happy woman over here!
connie gray says
Jeanine, when using your silicone loaf pan to prevent it from spreading out just insert it into one of your same size glass or metal loaf pans it will still cook the same maybe even have a nicer bottom since there is extra protection from the heat there, it will help keep your loaf shape……
Susan Terzo says
I used this as a base and modified to the Plant Paradox diet. Turned out great!
Phyllis says
Thanks Jeanine. All your recipes are very tasty. I have made your sandwich bread using the Pullman pan, and am just delighted with the result. It looks like a loaf of bread. Yea! Also every muffin recipe is excellent especially the bran muffins. Your site is the best . Merry Christmas to you and your family . Phyllis
Rainy says
I know this must taste wonderful, however would like to warn anyone with thyroid issues that millet is dangerous for them. I make your flax bread WONDERFUL!
Carmen says
I made this recipe with some changes as I am allergic to milk and it is so far the BEST GF bread I have made! I changes the skim powder milk for the same amount of almond meal, the milk for the same amount of coconut milk, the canola oil for grapeseed oil. I also changed the potato starch for sweet potato starch, which was what
I had available. I have been trying GF bread recipes for 6 years now and this is hands down the best! It is soft but not soggy, nice crust but not crumbly, slices easily and the slices keep their shape. THANKS!!!
Fulvia Severino says
Hi Jeanine,
I just made your Millet Sandwich Bread. My daughter and I have decided to go gluten free this last month, have tried many recipes that I have found online, even using pre bought bread mixes, but never happy with the results.
This by far is the best result I have been able to achieve. Better than store bought Gluten Free in taste and texture.
I did make some minor changes as my daughter can not have tapioca, so I used arrowroot instead and changed the skim milk amount to more almond meal.
Many thanks and I am eager to try more of your recipes.
Fulvia 🙂
Manisha says
I made this in the bread machine using gluten free setting. But have to say did not come out as well as the regular gf bread loaf recipe. It seemed to rise well enough as much as I could tell in the machine. It could be the millet flour I used but the loaf was quite dry and and a little brick like so not great for Sandwiches but it toasts up well. Not sure I want to try it again might stick to your other recipe.
Carole says
I made this bread in my bread machine, on the rapid cycle today and it turned out great! Thanks for the recipe! This is my first attempt at gluten free bread!
Natasha Amit says
Can I use corn starch instead of potato starch for this bread.
Also can I use soy milk as my daughter is lactose intolerant. Thanks
Bethany says
This is a long stretch, but do you how to make this bread yeast-free? I know it is possible to substitute baking soda and an acid to make bread rise, but I can’t figure it out myself. I am allergic to gluten, but even more allergic to yeast! Any advice you or your readers may have is greatly appreciated!!
Jeanine Friesen says
I wish I knew, Bethany. Sorry, I’m not sure either. The texture would be different, but it might work.